Artist Notes
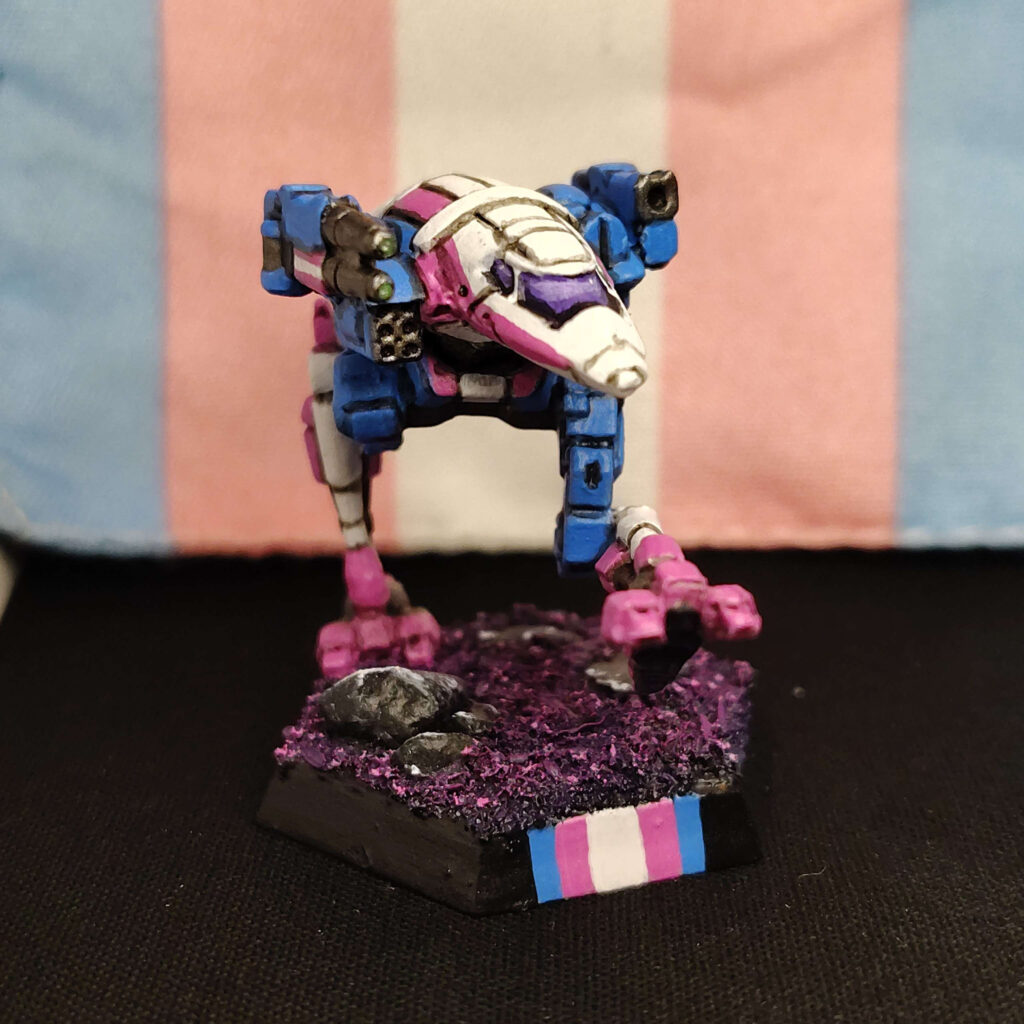
Trans Fights! Use your brand new borrowed Capellan hardware to show the Great Houses what a REAL Pride Parade looks like!
Paint List
MAIN
- Rust-Oleum Flat White Primer rattle can
- Liquitex Heavy Body Acrylic (HBA), Titanium White
- Citadel Hoeth Blue
- Vallejo Pink
- Citadel Leadbelcher
- Citadel Nuln Oil (I still have a pot of the old formula, RIP)
- Krylon Clear Gloss Acrylic Coating rattle can
- Aleene’s Original Matte Finish Acrylic Sealer
CANOPY
- Citadel Naggaroth Night
- Vallejo Blue Violet
- Liquitex HBA Titanium White
LASERS
- Army Painter Greenskin
- Army Painter Jungle Green (do not buy this, any bright green will work, this sucks so bad)
- Liquitex HBA Titanium White
BASE
- Citadel Abaddon Black
- Citadel Naggaroth Night
- Vallejo Blue Violet
- Vallejo Violet
- Vallejo Pink
- Reaper Minis Misty Grey
- Liquitex HBA Titanium White
- Citadel Nuln Oil
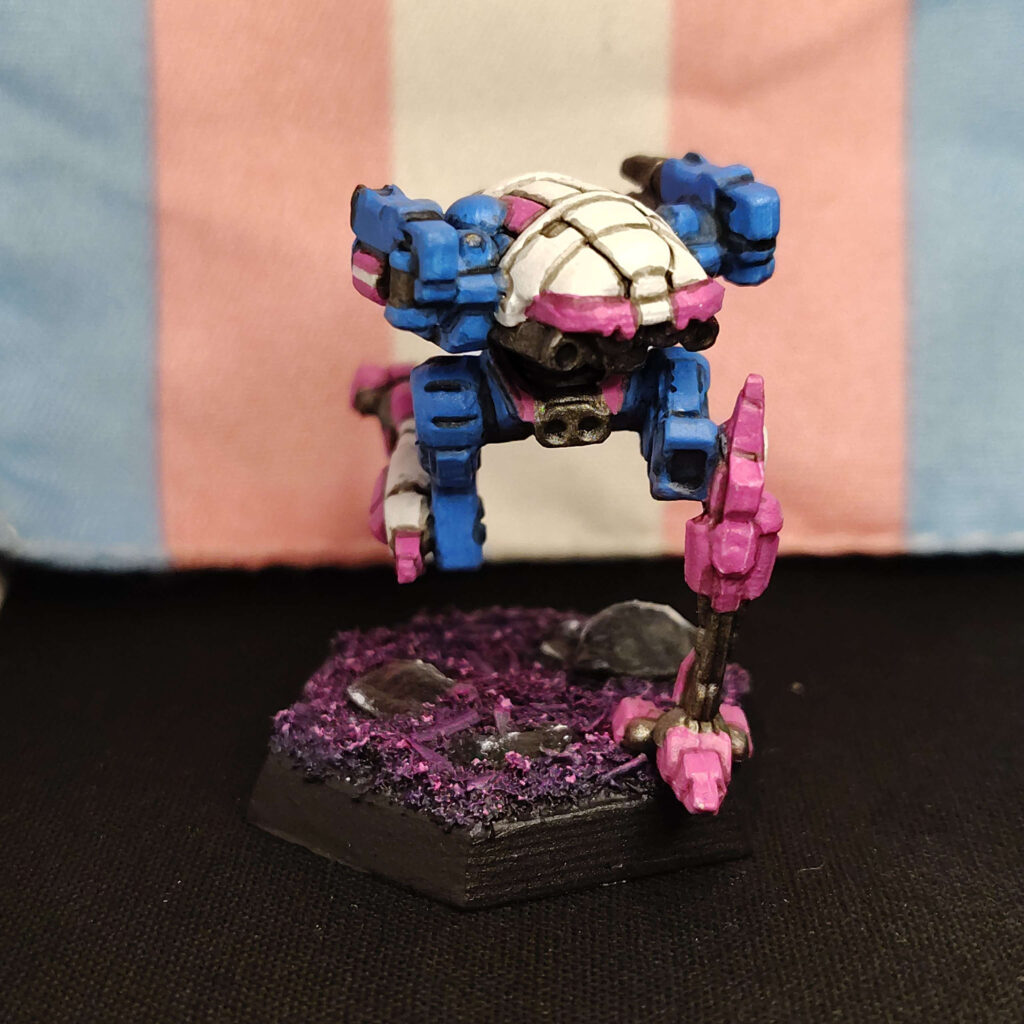
1. I started first by cutting the mech free from its base, soaking it in hot water to repose the legs, and applied cuts in the feet to repose the toes, applying superglue to lock in their new positions. Due to it’s now very wide stance and it being on one foot, I drilled and pinned the right foot with a paper clip and gave a custom, 3D printed base a matching hole. I kept the paperclip long so I could stick it on some cork on a paint handle.
2. Coat with the Rustoleum White Primer.
3. Give areas meant to be white a coat of the Liquitex Heavy Body Acrylic Titanium White. I use a good heavy body acrylic because it is cost effective (I spent $16 on a tube that will last my entire mini painting career) and because it has excellent pigment density for a white paint. It just needs a LOT of thinning with either water or acrylic medium.
4. Block out your pink areas with the Vallejo Pink, including any finer details. Do the same for the blue areas with the Citadel Hoeth Blue. Color placement isn’t that important as long as you keep it fairly balanced between the white, blue, and pink, though I also suggest following the stripe scheme on the flag itself, blue-pink-white-pink-blue, with variation to match panels and the natural shapes of the mini.
5. Use Citadel Leadbelcher to block out weapon barrels, missile tubes, joints, and other structural or mechanical bits.
6. LET YOUR MINI DRY. Give it a light coat with the Krylon Clear Gloss coating.
7. LET YOUR MINI DRY. Then, use your Nuln Oil, or any other black wash, first to coat all of your metallics and to fill in the cockpit windows. After that, use a small, pointed brush to lightly apply your Nuln Oil to every recessed panel line, corner, and crease in the miniature. (NOTE: If you’re smarter than me, you can instead use an enamel wash to properly pin wash the miniature, but I found out too late you can’t really do that with acrylics.) Do not worry too much about it being sloppy, and don’t be afraid to go over any bit multiple times for your ideal shade.
8. LET YOUR MINI DRY. Then, use the white, pink, and blue to correct any mistakes with the Nuln Oil, or just generally to clean it up. You want to maintain the bright colors here.
9. Brush new Leadbelcher over the tops of your weapon barrels, and lightly edge-highlight any up-facing metallic edges to help bring back the shine.
10. FOR THE CANOPY: Block in the canopy with Naggaroth Night. Layer on additional layers of varying mixes of the Vallejo Blue Violet and the Titanium White to create a gradient effect, each layer covering less of the overall surface, until you’ve got the smallest edge with an purply off-white. Add a tiny dot of White over your lightest colors, to show a focal point for the light source. Make sure to repeat this for all panels, even those that would technically be facing away from the light source.
11. FOR THE LASERS: Start by coating the inside of the lens with the AP Greenskin. Then, add a dot of your bright green in the center. Then, the tiniest dot of Titanium White in the center.
12. FOR THE BASE: First I coated the top layer in a thin layer of PVA glue and sprinkled a mix of coarse flock and bits of small twigs and wood debris to give it a generous coating. Tap the base with your finger to shake off loose flock. Dry fit your mini to make sure nothing is interfering with its contact points with the base, keeping in mine where it is. Use superglue to apply rocks, and press them down with tweezers so they sink a little into the flock. I also like to use a mix of PVA, acrylic medium, and lots of water to help glue the flock in place at this point so no loose bits break off while painting. LET IT DRY.
13. Give it a healthy coat of Primer.
14. Base coat it entirely with Abaddon Black.
15. Dry brush on layers of color for your foliage, starting with the Naggaroth Night, moving to brighter colors using lighter and lighter applications. When it’s time to use the pink, I suggest using a detail brush on the very tips of the flock to resemble flowers.
16. Block out the rocks with more Abaddon Black, to cover where they were hit with the bry brush. Use your Misty Grey (any really light grey will do)to edge highlight the jagged edges of those rocks, follows by even lighter highlighting with Titanium White. We wanted an obsidian-like look, so we did not worry about gradient, we want the sharp contrast.
17. Clip the pin in your minis foot to appropriate length, then assemble the miniature. Use superglue on both the pin and the bottom of the foot where it will be in contact with the base for maximum stability.
18. Give it a coat or two of your Matte Finish acrylic sealer for protection. And it’s done!